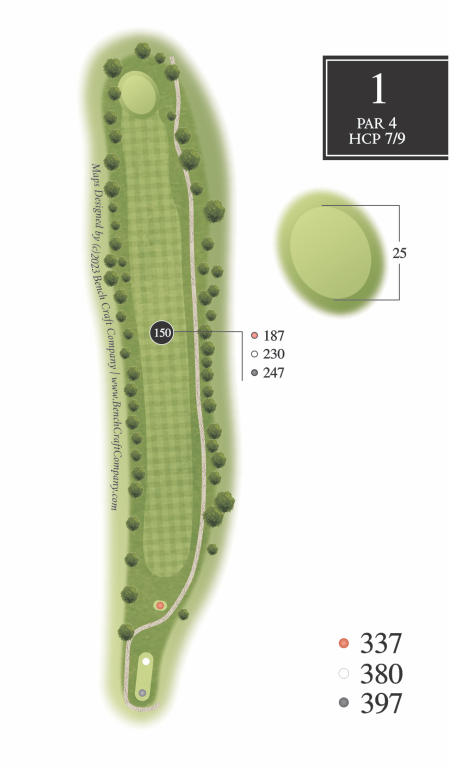
THE 1ST HOLE
This opening par four is straightforward and not overly difficult. It is also a good preview of what lies ahead. It is framed on both sides with a number of Cedar trees and if you can stay out of them, there is a good chance you will get your round off to a good start. Don’t overshoot the green or you could end up in a high rough.

THE 2ND HOLE
This is a challenging par four because of the need to get around a stand of conifers on the left side of the fairway that block the green. The best tee shot would be to just miss the branches of the towering fir tree on the right side and land your ball on the right side of the fairway. On your shot to the green if you go too far right and short, you may have trouble finding your ball in the high rough.
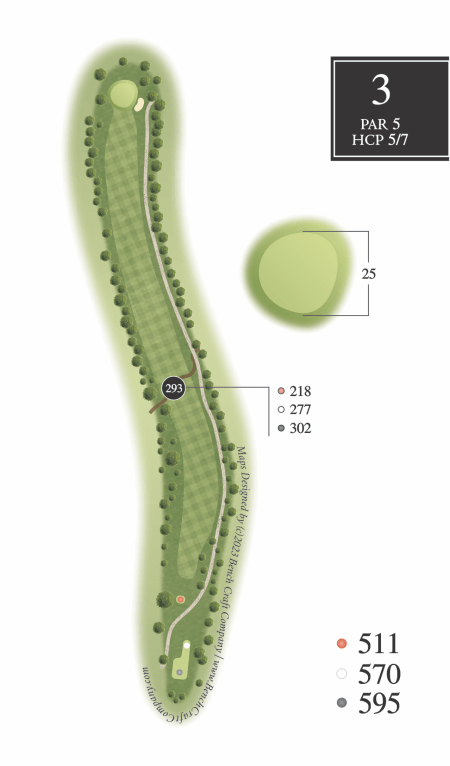
THE 3TH HOLE
On this par four, keep in mind the uphill yardages to carry the bunker toward this hole’s lengthy, two-leveled green. Laying up short is sometimes the safest play but could lead to a blind shot to the pin.
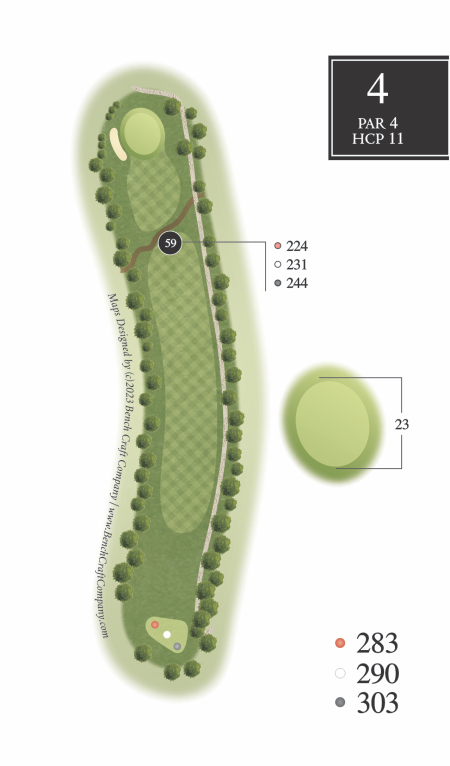
THE 4TH HOLE
Don’t underestimate this short par four, as the risks often outweigh the reward. If you decide to lay-up in front of the hazard, keep your tee shot to the right as everything tends to bounce to the left. For those who think they can drive it near the green with some accuracy, go ahead, but steer clear of the long bunker guarding its left flank.
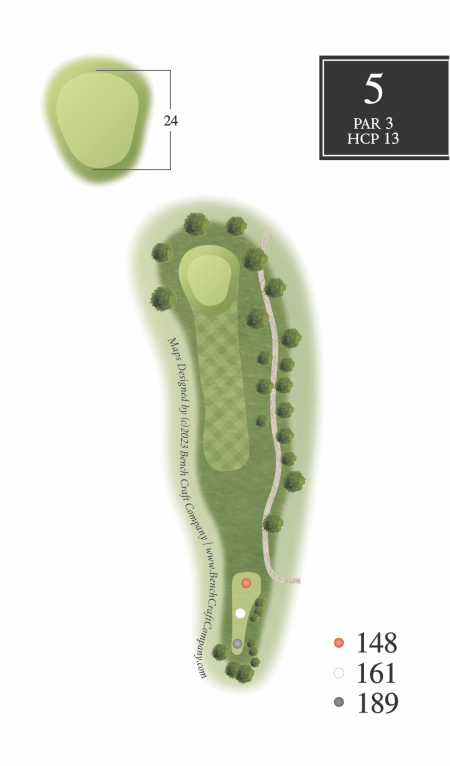
THE 5TH HOLE
A comfortably wide and open fairway and lack of any bunkers make this par three one of the easier holes on the course. Because of the slope, try to keep it short of the hole if the pin placement is on the front left of the green.
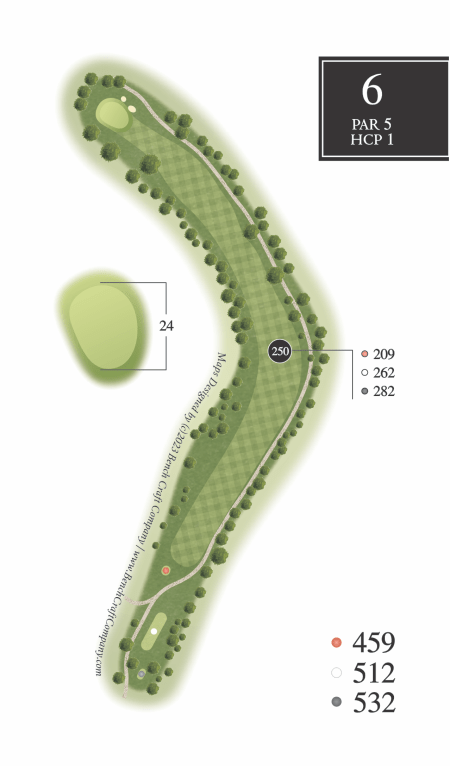
THE 6TH HOLE
This par five is the hardest ranked hole on the course. Keep your tee shot on the right/center side of the fairway unless you can drive it through the dogleg to the left. Keep in mind that there is an out of bounds to the right. A large fir tree, 50 yards out, guards the left side of the green and the right side has two bunkers. It’s best to keep your approach shot in the center of the fairway.
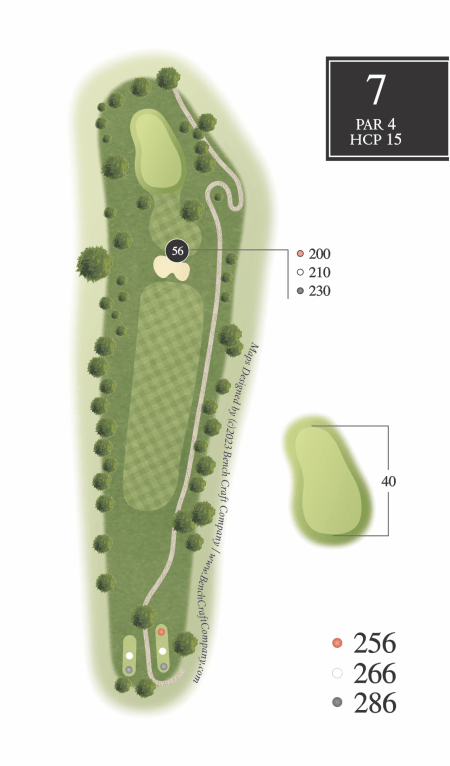
THE 7TH HOLE
On this hole, the longest par five on the course with a double dogleg, the downward sloping fairway makes the distance to the hazard play shorter than the yardage. Second shots landing on the right side of the fairway will often kick into the trees. A large bunker guards the right side of the green and on the left side and back is a deep swale.
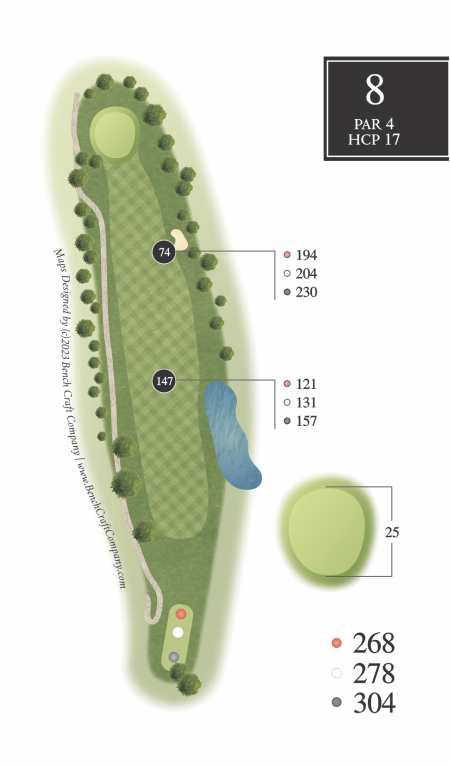
THE 8TH HOLE
This hole is a relatively short and straight par four that gives you a great chance to get one back. For the shorter hitters or those that prefer to lay-up, keep in mind the fairway bunker on the right side. Because of the high rough on the back side of the green, it is better to be short than long on this hole.
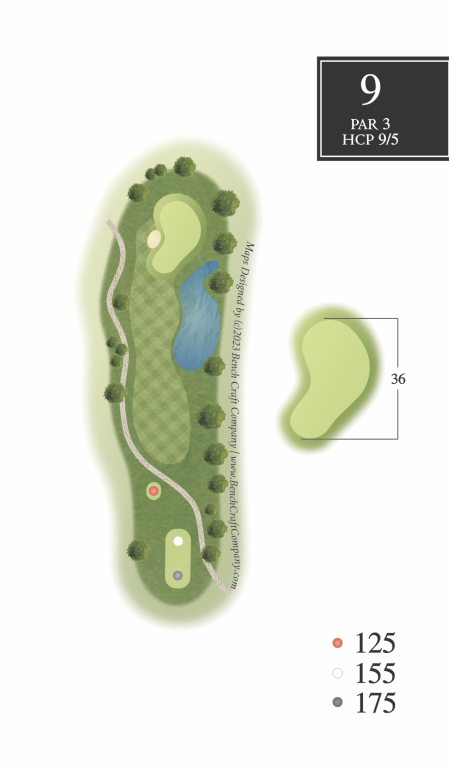
THE 9TH HOLE
This par three is uphill so use plenty of club. Shots that land on the hill short and right may end up in the water. Pay attention as there is a bunker on the left side of the green. Most putts break more toward the pond than they appear.
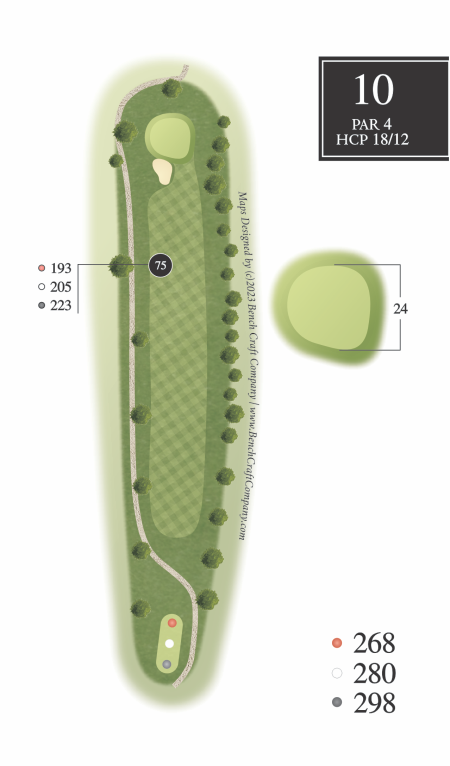
THE 10TH HOLE
Starting out the back side, you have an easy par four. It is a straightaway shot. You just have to watch out for the bunker protecting the left front of the green. The green itself is sloped from back to front, so it is best to stop short of the pin for the uphill putt.
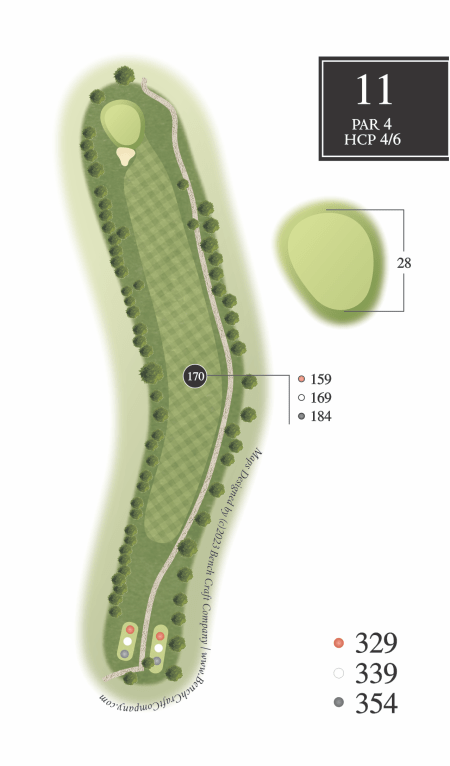
THE 11TH HOLE
On this par four, there is a large Douglas Fir tree that tends to discourage going straight for the green unless you challenge the corner with a draw or high fade. Once past this obstacle, the green is guarded by a bunker on the left front side and a deep bowl-like swale on the right side. The green itself is shallow on the right and your putts will break more toward Mt. Hood than you may anticipate.
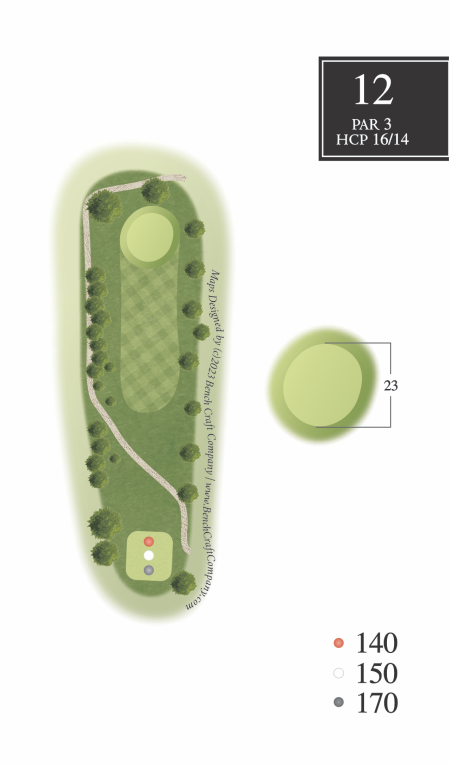
THE 12TH HOLE
On a clear day, framing the backdrop on this par three is a spectacular view of Mt. Hood and the Cascade Range. Guard against long and left off the tee. Shots landing just short and right often kick left towards the middle of the putting surface.
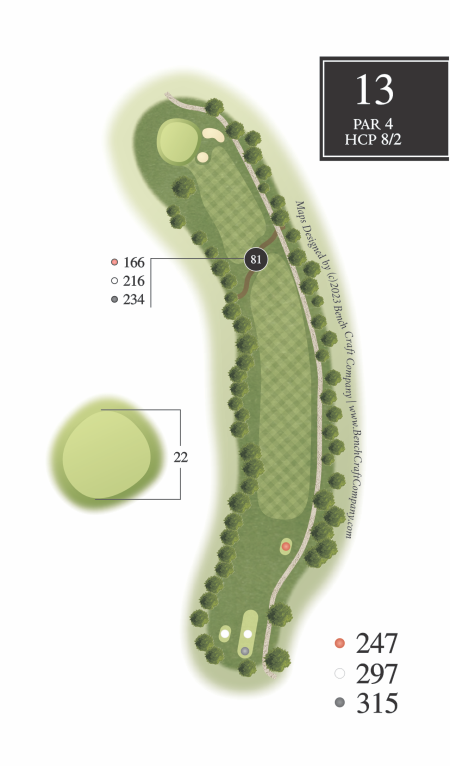
THE 13TH HOLE
This challenging par four brings about a recommendation to stay right off the tee. Keep in mind that the seasonal creek bed hazard cuts through this fairway. A tee shot landing in the middle of the fairway or left, short of the hazard, often leaves you in the trees or blocked from the green by trees. A pair of bunkers guard the right front and side of the green.
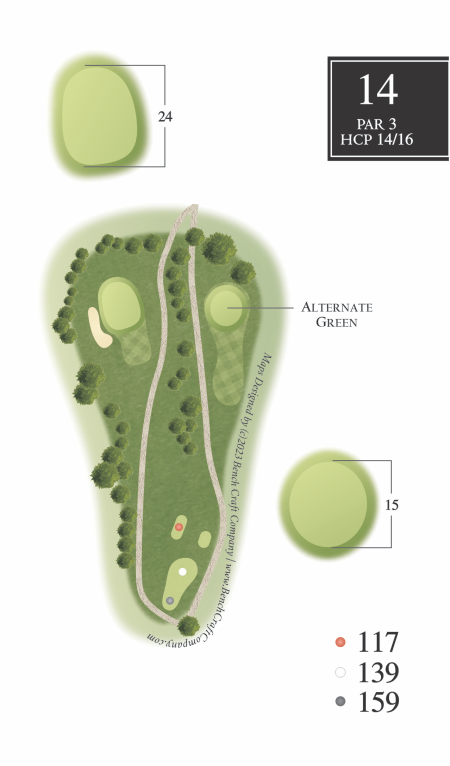
THE 14TH HOLE
Our signature hole, a par three, from an elevated tee, looks down on a green nestled in the valley and is surrounded by trees. Shots hit over, or too far right, can leave you in deep rough or trees. Shots to the left can put you in the bunker. Shots to the far left will put you in the woods forcing you to face a steep hillside and blind chip shot. If the pin is on the left side of the green, it is better to keep it short of the hole leaving you an uphill putt.
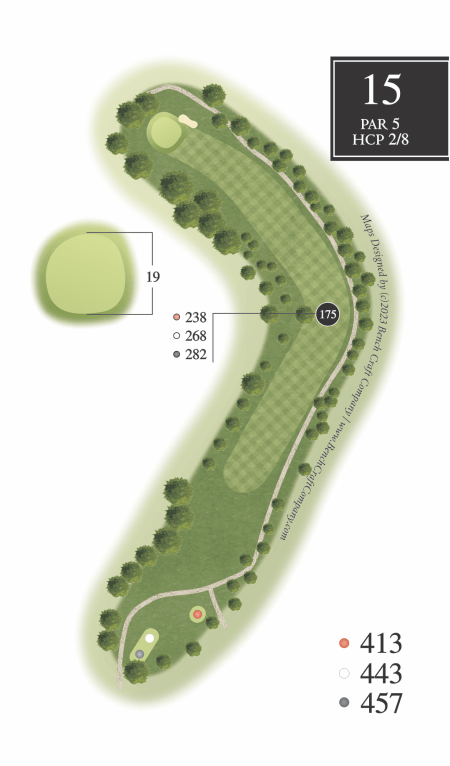
THE 15TH HOLE
Your tee shot on this par five takes you over a large ravine. Aim for the right side of the fairway unless you think you can drive it past the large Douglas Fir dominating the left corner of the dogleg. This brings into play another smaller ravine to get to a green that slopes from back-right to front-left with a bunker on the right side.

THE 16TH HOLE
A straightforward par three with a green that slopes from back to front and left to right and has a bunker located on the front-right side. A shot to the center of the green is your best bet on this hole.
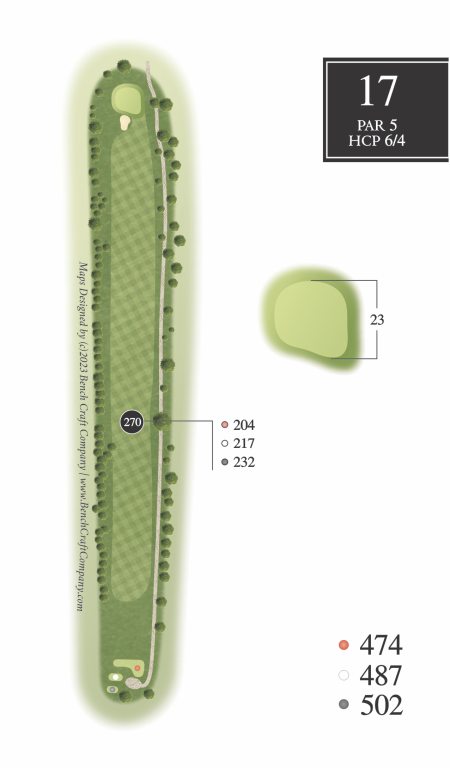
THE 17TH HOLE
On this long, straight par five, now is your chance to “grip it and rip it”. Tee shots on the right or left sides of the fairway generally roll much more than the middle. Approach shots that land just short and to the right of the green often kick towards the middle. A bunker guards the left front of the green.
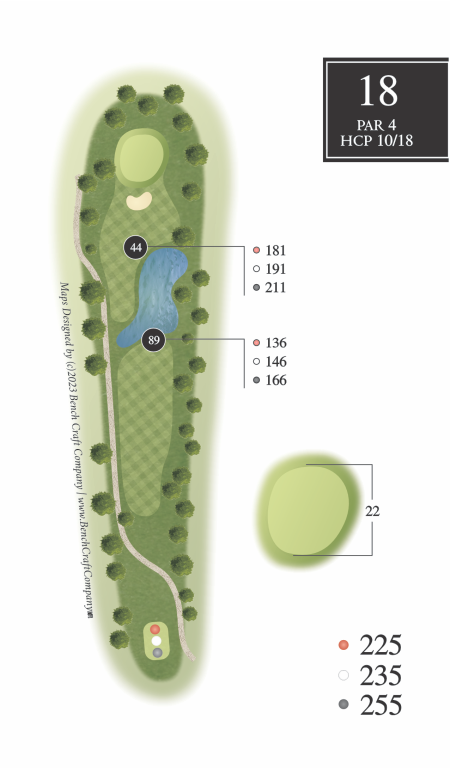
THE 18TH HOLE
As our golf pro “Hagie” says, “this par four is the hardest easy hole there is.” A lay-up tee shot just short of the water hazard and easy second shot will usually put you on the green. For those that feel they can drive the green, keep in mind that there is water to the right, left and bisecting the fairway. Add to this the bunker that guards the front of the elevated green, and you have a very dicey shot. Shots (almost) stopping on the front right of the green often roll all the way back down the hill.
Maps by Bench Craft Company, click to visit their website in a new tab.